Image by Susan Cipriano from Pixabay
It’s a clear night and the bright full moon is shining in the sky. This should be easy enough – you think to yourself. You take out your Nikon D3500 and snap a photo in automatic mode. You take a look at your LCD expecting a magnificent image. However, you struggle to find the moon. You zoom in and see a blurry white dot. Where did you go wrong? Photographing the moon with your Nikon D3500 can be difficult, fortunately, we made a 9 step guide that makes it easy.
1. Get the necessary equipment
If you want to photograph the moon and have it not look like a dot, you need a zoom lens. To capture a good amount of detail in the moon and not have to crop most of the photo out, you need at least a 480mm lens. Because the Nikon D3500 is not a full-frame camera, we can reduce this to around 300mm. You should generally use Nikon lenses with Nikon camera’s but even doing that, there are some limitations on certain lenses. To find which lenses are compatible with the Nikon D3500 see this article.
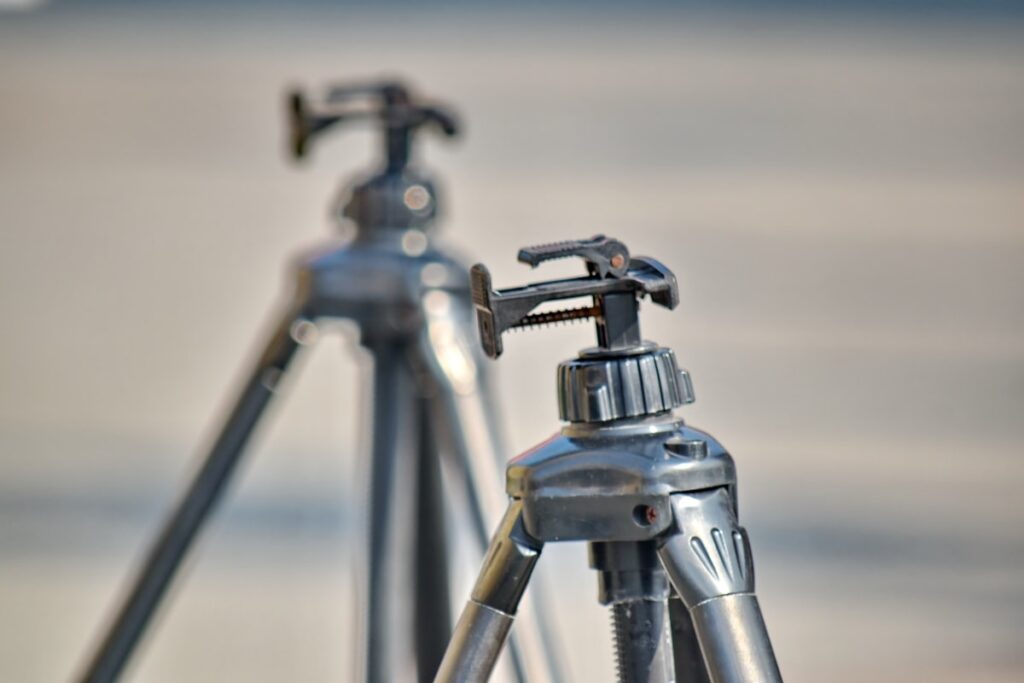
Now that you have a zoom lens, you need a tripod. You need a tripod to prevent blur, even if you think you can hold your camera incredibly still, you still require a tripod because when using a zoom lens, small movements are amplified. A remote shutter release button is optional but recommended. A remote shutter release button is a remote control to take your photos. When you press down on the shutter release button, your camera moves a small amount, causing blur. The shutter release button solves this issue.
2. Choose a location
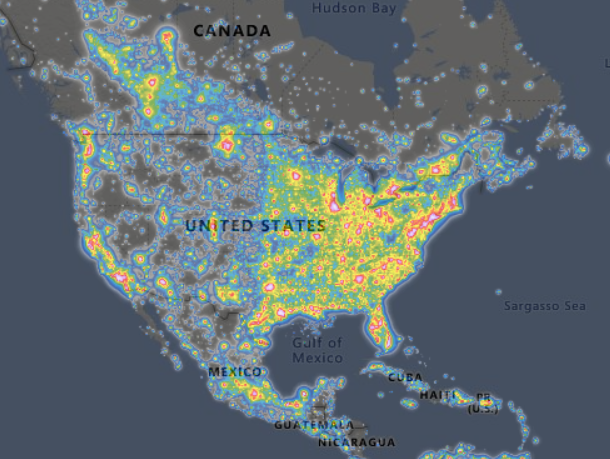
Now that you have all your equipment. You need to choose a location to take your photo. Usually, light pollution is a huge factor when picking locations in astrophotography. But because the moon is so bright, light pollution is less of an issue but you still need to take it into consideration. You can use https://darksitefinder.com or https://www.lightpollutionmap.info/ to find locations with low light pollution near you. You also need to take the climate of the location into account, as weather predictions are not always accurate, its best to pick a place that doesn’t rain often.
3. Pick a date and time
Now you need to pick a date and time to take the photo. Check the weather report to make sure there will be clear skies on the day you plan to take the photo. You don’t want clouds to obscure the moon. Check the weather every day until you take the photo as weather reports can change. A factor that is just as important as the weather is the phase of the moon. You can check the phases of the moon here. Ideally, you want to take the photo during a full moon or gibbous so you can capture the most detail in your photo.
If you want to go the extra mile, take the photo during a supermoon or lunar eclipse. A supermoon is when the moon is extremely close to the earth, making the moon bigger. A lunar eclipse is when the earth casts a shadow on the moon. During a full lunar eclipse, the moon turns blood red. Timeanddate.com has a good supermoon calendar. As well as a lunar eclipse calendar.
4. Set your aperture
Now we need to adjust our shooting settings, I recommend switching to manual mode for this. We’re going to be using the “Looney 11 rule”. The looney 11 rule is to always use f/11 when photographing the moon and to set your shutter speed to the reciprocal of your ISO. More on that later, but most lenses have a sweet spot, which we will use instead of f/11. It can range from f/11 to f/16. You can research your lens’s sweet spot by simply typing in the model of your lens and “sweet spot” into google.
5. Set your shutter speed

As mentioned earlier we’re going to be using the Looney 11 rule. If your not using f/11, still follow this rule but change it a bit based on your aperture. So if you’re using a slower aperture, increase the shutter speed or ISO by a small amount. The Looney 11 rule says to use the reciprocal of your ISO for shutter speed. So if your ISO is 100, set your shutter speed to 1/100, if it’s 200, set your shutter speed to 1/200, and so on.
6. Set your ISO
When you set your ISO, your setting your shutter speed as well since your shutter speed is dependent on your ISO. So you need to take into account how much noise you think is acceptable in your photo, and how much blur is acceptable in your photo. If you don’t have a remote shutter release button, go with a higher ISO and less shutter speed to reduce blur when clicking camera buttons. If you do have a remote shutter release button or you hate having noise in your photo, go with a lower ISO – which leads to a higher shutter speed.
7. Manually focus on the moon
Because the moon is so far away, your autofocus may have trouble focusing on the moon and will attempt to focus and refocus over and over but never achieve it. If this is the case, you need to manually focus on the moon. Switch to manual focus mode and look through your viewfinder. Slowly move the manual focus ring until the moon is in focus, this shouldn’t be too difficult. You can take a test photo to make sure the moon is sharp.
8. Zoom in and take the photo
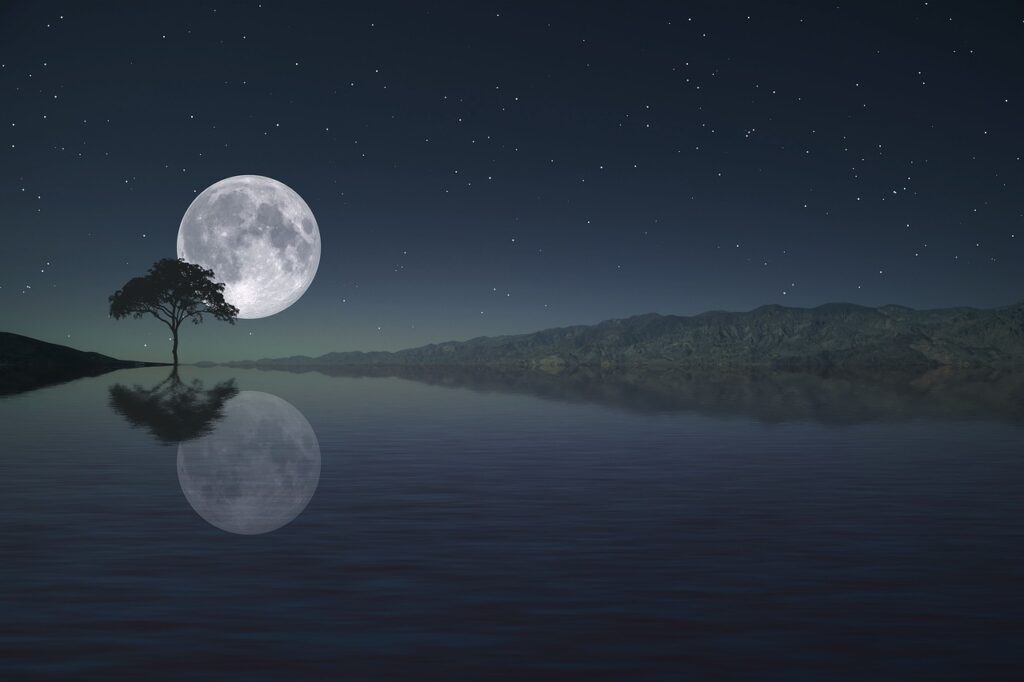
Now you’ve adjusted your settings and focused on the moon. Now you just need to take the photo. A photo with only the moon in it is generally boring, and there are hundreds of them already, so be sure to get other objects in the background like trees, hills, or buildings to keep your photo interesting. If you want a specific object in your photo, you should photograph it from far away.
This creates the illusion that the moon is extremely large. If you want an object in your photo, a tree for instance. You want the moon to look large compared to it. When you zoom in, both the tree and the moon get bigger and comparatively the moon still looks small. You want the tree to look normal-sized, and the moon to look huge. You can achieve this by photographing the tree or whatever object you want in your photo from very far away. That way the tree looks normally sized since you’ve zoomed in on it from a distance, and the moon looks big in comparison. That’s how you get photos like the one below.

9. Post-process
There are many advanced techniques to post-process the moon, but these are for people who own software like Adobe Lightroom and have taken multiple photos and want to stack them. I put a link to a great article I found on how to do them. But if you don’t own Adobe Lightroom or you don’t know enough about it to do this, then you can use Adobe Lightroom CC, a free version of Lightroom for iOS and Android. It doesn’t have nearly as many features but it gets the job done. For post-processing were not going to do anything too fancy. Simply crop your photo if needed. Change the exposure amount, and adjust the contrast, and you’re done. If you photographed a lunar eclipse you can increase the saturation to bring out the blood-red color of the moon.