The first time I tried to photograph a bowl of ramen at Cuppage Plaza, I nearly gave up. My broth had a shiny white blob on it, the egg looked grey, and the whole shot felt like a hospital cafeteria food photo. I sat there frustrated, soup going cold, wondering why my food photography never looked the way the meal tasted.
That night taught me something I now believe completely: harsh light is not the enemy. Uncontrolled light is. This guide is for anyone in Singapore who loves shooting supper but keeps fighting strange colors, hard shadows, and glare in older buildings like Cuppage Plaza.
By the end, you will know how to walk in, read the light source, choose a better angle, and make three solid frames before your food dies.
Why Cuppage Plaza Food Photography Is So Tricky
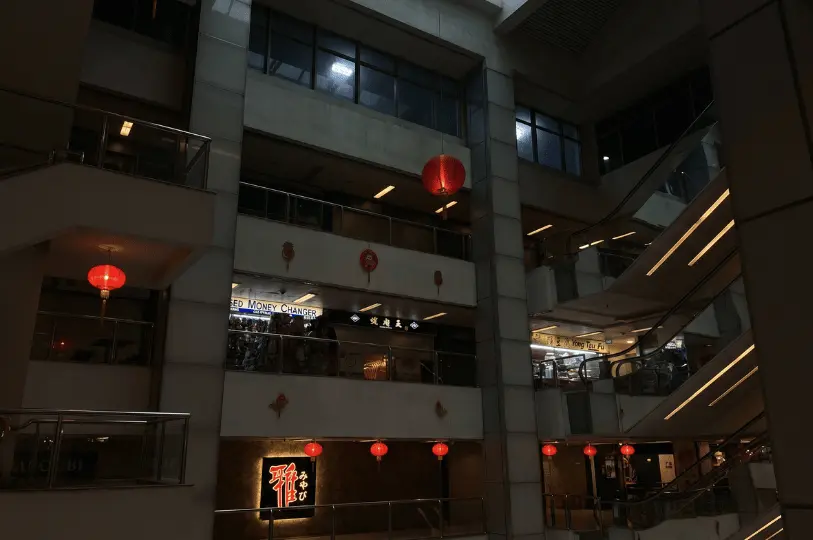
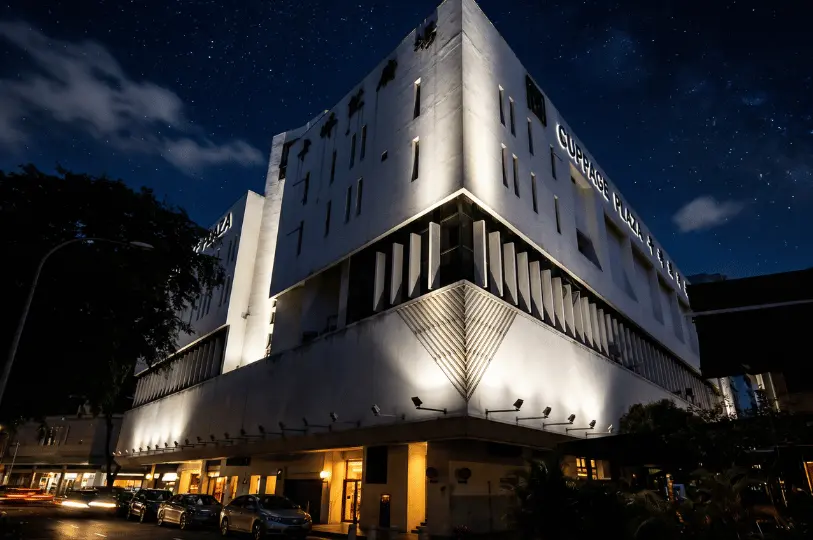
Cuppage Plaza is an older, compact, late-night Japanese dining enclave near Somerset MRT. It is filled with intimate restaurants, counter seats, regulars, and salarymen who have been coming for years. It is also a food photography challenge if you do not know what you are doing.
The problem is the mix of light. You have mall corridor lighting, warm izakaya bulbs, neon signage, grill glow, glossy tables, and your own phone screen all fighting each other. The result? Rice turns yellow, sashimi loses its freshness, soup goes muddy, and grilled food starts looking neon orange.
Then there is glare. Harsh light from overhead downlights bounces straight off ramen broth, lacquered bowls, oily skewers, glazed plates, metal chopstick rests, and bowl surfaces. Beginners often read this as “brightness.” It is not. It is a shiny reflection ruining your hero ingredient and pulling the viewer’s eye away from the real subject.
Natural Light Is Rare at Cuppage Plaza, So Read the Room First
In a bright cafe, natural light can do half the work for you. At Cuppage Plaza, you usually do not get that luxury. Many dining rooms are tucked indoors, behind narrow corridors, beneath mixed artificial light, or beside warm signs and reflective walls.
That does not mean the scene is impossible. It means you have to pause before raising the camera.
Look at where the main light source is coming from. Is it directly above the plate? Is it bouncing off the table? Is it hitting the glossy side of the bowl? Is the background too bright for steam to show? These tiny questions make a huge difference in the final image.
Hard Light, Harsh Light, and Artificial Light in Food Photography
More light is not always better. Harsh light gives you visibility, but not always texture or quality. A bowl can be bright and still look completely flat.
Hard light is not always bad either. It can create shape, contrast, and drama when it comes from the right direction. The problem starts when hard light lands in the wrong position and blasts the glossy part of your dish.
Overhead shots solve some problems, but not all of them. Flat lays work for bento trays, salads, gyoza plates, and some round bowls. But they fail with skewers, tall drinks, steam, and grilled meat with height. A 45-degree angle usually keeps depth and texture better.
Direct flash can make restaurant food look clinical and cold. If you must add artificial light, bounce it or use a diffuser for a softer effect. Editing helps color and contrast, but it cannot recover blown highlights on broth, oil, ceramic, or quail eggs. The real fix happens before you press the shutter.
Calm Down: Cuppage Plaza Food Photography Does Not Need a Studio Setup
A lot of first-timers freeze up in these small rooms. You worry about being watched, blocking a narrow aisle, taking too long before eating, or annoying tired staff. Those are fair concerns. Many Cuppage Plaza restaurants are tiny and turnover-sensitive.
Here is my reassurance: you are not staging a studio shoot. You are making three deliberate frames before the food collapses.
One hero shot, one texture shot, one human-detail shot. Done.
You do not need a huge setup, a full lighting kit, or a table filled with props. Most of the time, a napkin, a dark menu, a steady hand, and a clear idea of your frame are enough.
My Step-by-Step Process for Food Photography at Cuppage Plaza
Choose the table before the dish.
Look for a seat where the main downlight is not directly above your plate. A side-lit table beats the brightest table every time. If you are stuck under harsh light, slide the dish toward the table edge so the light hits at an angle.
Find the glare source.
Tilt your phone or camera slightly and watch the shiny patches. If glare slides across broth, sauce, ceramic, or the side of the bowl, that is a reflection. Shift your angle until the shine moves off your hero ingredient.
Use a bounce card and negative fill.
A white napkin or menu works as a tiny reflector and fills shadows on the dark side of the bowl. A dark menu, jacket, or black phone case deepens shadows if the food looks washed out.
Shoot the safe frame first.
Take one clean 45-degree shot before experimenting. This protects you from overworking the dish until the steam vanishes, the noodles go soggy, and the meal loses its shape.
Fix your white balance.
On a camera, start around 3200K–4200K for warm indoor light, then adjust by eye. On a phone, tap and hold to lock focus, drag the exposure down a touch, and correct warmth later in editing.
Slightly underexpose.
Under harsh lights, protect your highlights. It is far easier to lift shadows than to recover blown glare on broth, egg, glossy sauce, or a white plate.
Then chase the details.
Once your hero frame is safe, shoot noodles being lifted, steam rising, sauce being brushed, charred edges, quail eggs on a skewer, or a hand placing a dish on the table. These quiet moments are my favorite part of food photography.
What to Bring for Food Photography at Cuppage Plaza
You do not need expensive gear. Bring a phone or camera you already know, a lens cloth, a small power bank, and one folded white napkin or thin white card as a diffuser or reflector.
For cameras, a 35mm or 50mm equivalent works well in tight spaces, and a macro-capable lens is lovely for grill marks, roe, pasta, sauces, and tiny textures. Skip the bulky bag and definitely skip the tripod.
This is where many beginners go wrong. They think better food images come from more equipment. In a cramped restaurant, too much gear can make you slower, clumsier, and more self-conscious. The best tool is usually the one that lets you move quietly and finish the shot before the dish changes.
Singapore humidity can fog your lens the second you step into strong air-con. Give it a minute to adjust, then wipe it before your first photo.
Timing Tips for Cuppage Plaza Food Photography
For timing, I would suggest early dinner around 6:00–7:30 PM. Staff are less rushed and your dish arrives before the room fills. If you want a moodier, nocturnal feel, go after 8:30 PM, but expect more crowds, more movement, and less control.
Counter seats are gold for hands, fire, cooking, and steam. Corner tables are better for controlled plate shots and using your little bounce cards. For small restaurants, reserve ahead and ask politely for a corner seat, not as a demand.
Habits Food Photographers Use to Make Better Images
These are the things experienced food photographers do almost without thinking.
Control light before composition.
A gorgeous frame cannot rescue ugly glare. Soften, block, or redirect the light first, then frame.
Use side angles for glossy food.
For ramen, curry, soup, pasta, and lacquered bowls, a slight side angle reduces direct reflection and hard light.
Shoot steam against darkness.
Steam disappears against bright backgrounds. Use a wooden counter, dark wall, or shadowed corner behind the dish.
Use the real table.
Chopsticks, soy dishes, grill tongs, wet towels, and condensation rings feel honest. Fake props do not belong here.
Watch the edges of the frame.
The background can either support the story or ruin it. A half-filled glass, a messy receipt, or a random door behind the subject can pull attention away from the food.
Be polite.
A quick “Is it okay to take a photo?” goes a long way. Do not block service paths where staff carry hot grill plates. Avoid recognizable faces in the background, and do not turn eating into one long photoshoot.
A successful harsh-light photo has clear texture on the hero ingredient, controlled highlights, believable color, a sense of place, and one intentional shadow.
Real Cuppage Plaza Food Photography Scenarios
Ebi Bar: basement prawn noodles.
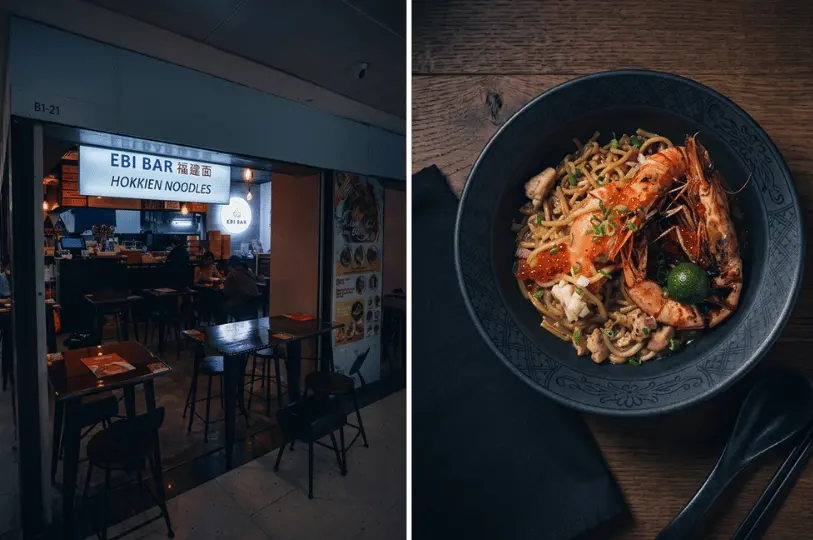
The broth, prawns, and ceramic all reflect light. Rotate the bowl about 30 degrees, drop your camera slightly lower, and add a napkin on the shadow side. Aim for the prawn head, broth surface, steam, and chopsticks coming in from the side.
Yakiniku-Oh: grill, smoke, and metal.
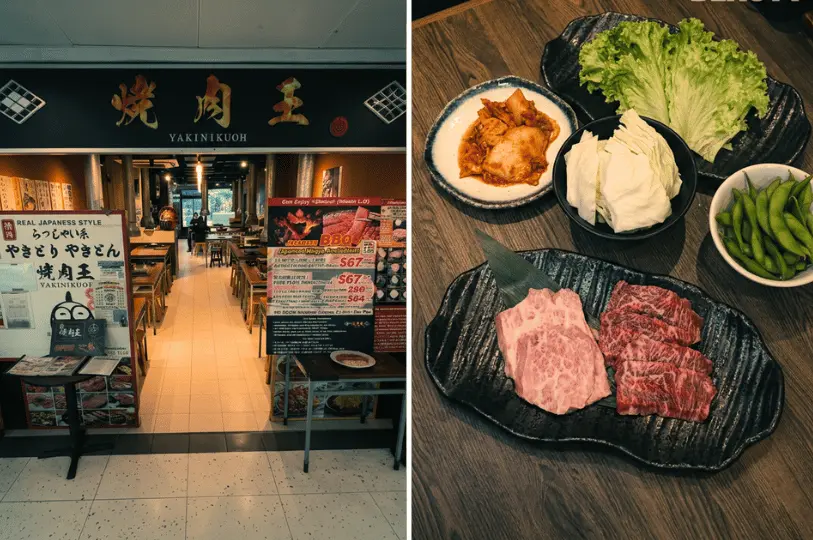
The grill is bright, the meat is dark, and the metal grid throws harsh lines. Expose for the grill highlights and let the shadows stay moody. Shoot when the meat just starts to render fat. Aim for tongs turning beef and smoke rising into a dark background.
Kazu Sumiyaki: skewers under hard light.
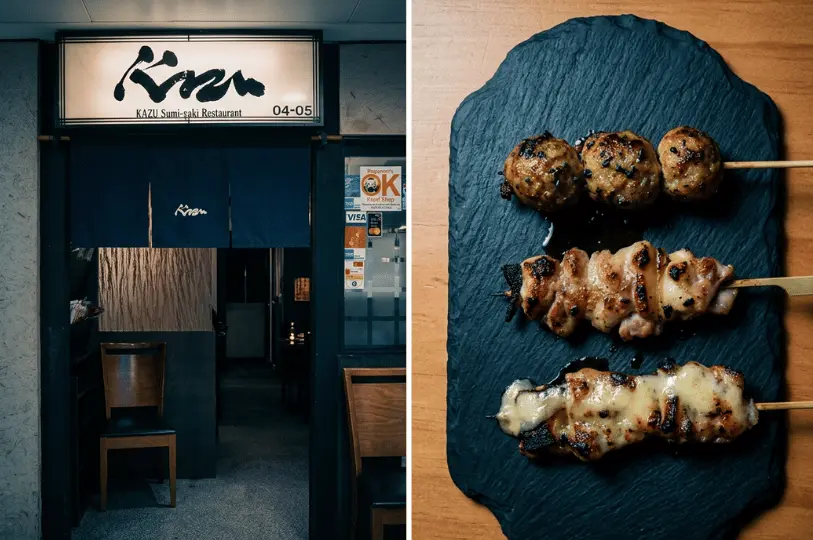
Under overhead hard light, skewers look dry and flat. Shoot from a low 30–45-degree angle so the glaze catches a thin edge of light. Add negative fill with a dark menu on the far side.
Gyoza no Ohsho: beige food, beige table, white light.
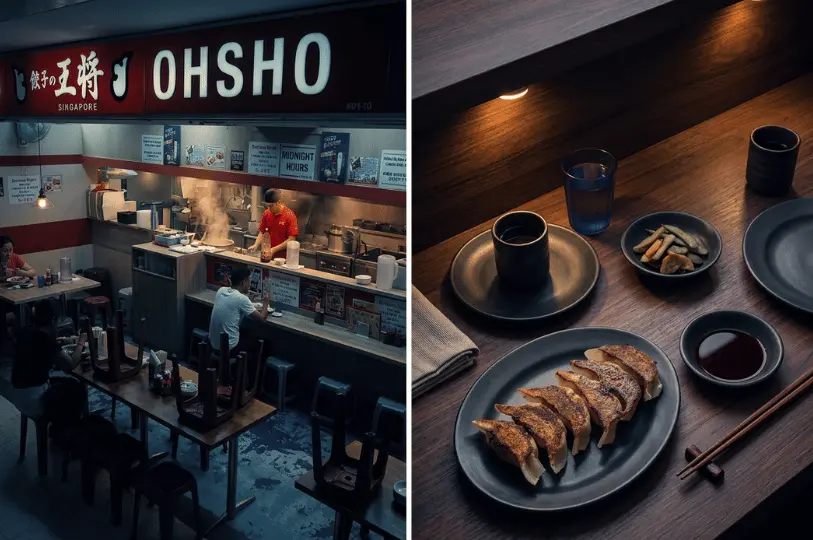
Use sauce, chopsticks, and steam for contrast. Break one gyoza open to show the filling. Keep the rice or ramen gently blurred behind it. This simple example is super helpful for learning how to build contrast when the whole table looks the same color.
The phone-only situation.
Your phone keeps making food too bright and yellow. Tap the brightest part of the dish, drag exposure down, and do not over-zoom. Move physically closer instead. Cool the white balance slightly in editing afterward.
Final Thoughts on Food Photography at Cuppage Plaza
The food at Cuppage Plaza deserves better than a flat, orange phone snap, and so does your memory of the meal. Do not be intimidated by the harsh light, the tight rooms, or the strange mixed glow from the mall.
Read the glare. Move your plate. Grab your napkin. Make those three deliberate frames.
I still mess up shots regularly. That is part of it. But every time I walk into that worn old building, I remind myself of the one lesson that fixed everything: harsh light is not the enemy. Uncontrolled light is.
Get a handle on that, and the rest just falls into place.

Miss Saigon: A 2AM Bánh Mì in the Quiet of Orchard Plaza
Sarah Teh | July 21, 2026
I went looking for air, not dinner. It was late, the kind of late where Orchard Road empties out and the malls go soft and grey. I wandered up to the second floor of Orchard Plaza, located at 150 Orchard Road #02-56, and there it was, lit and open, a little Vietnamese store that doesn’t…
-
The Tension of the Moment
Sarah Teh | July 16, 2026
There is a half second at a wok stall that I have learned to live for. The flame leaps, the hand tilts, and the whole dish hangs in the air before it falls back into the pan. Miss it, and you get a flat plate of noodles. Catch it, and you get the night itself,…
-
Tha Siam Thai Kitchen: A Thai Supper Glow Inside Orchard Plaza
Sarah Teh | July 15, 2026
Orchard Plaza after dark is a strange kind of quiet. The shiny malls down Orchard Road buzz with crowds, but up here the corridors hum under old fluorescent light, half the shutters down, the air still and slightly worn. I almost walked past Tha Siam Thai Kitchen. If not for the faint thread of Thai…
-
Nasi Lemak Picture Composition: How to Frame Rice, Sambal, and Fried Chicken
Sarah Teh | July 10, 2026
The first nasi lemak picture I ever loved was a failure. It was past midnight, under the harsh fluorescent stall light buzzing overhead, and I had shot the plate straight down the way everyone tells you to. When I looked at it later, everything had melted into one flat surface. The rice, the sambal, the…
-
A Bowl of Hokkaido After Dark
Sarah Teh | July 9, 2026
Photographing Japanese Soup Curry in the City It was past nine, and the rain had just stopped. I had been walking with a fogged lens and an empty stomach, looking for nothing in particular, when the warm light of a small soup curry counter pulled me in. I sat down before I even thought to…
-
Orchard Bak Chor Mee: Vinegar, Steam, and a Late-Night Queue
Sarah Teh | July 8, 2026
I’ll be honest, the first bowl that landed in front of me looked a bit sad. Pale noodles, not much going on, and I nearly worried I’d made a wrong call. Then I tossed it, and the whole thing transformed. That’s the trick with Orchard Bak Chor Mee. The sauce hides at the bottom, so…
-
Through Fogged Glass and Neon Lights
Sarah Teh | July 2, 2026
My lens fogged the moment I stepped out of the cab near Lau Pa Sat. The night air pressed in, thick and warm, and for a few seconds I could see nothing through the viewfinder but a soft white blur. I almost wiped it away in a hurry. Then I noticed how the neon from…
-
Mall Glare Tips: How to Shoot Food Under Harsh Lights at Cuppage Plaza
Sarah Teh | July 1, 2026
The first time I tried to photograph a bowl of ramen at Cuppage Plaza, I nearly gave up. My broth had a shiny white blob on it, the egg looked grey, and the whole shot felt like a hospital cafeteria food photo. I sat there frustrated, soup going cold, wondering why my food photography never…
-
A Lens on the Night
Sarah Teh | June 25, 2026
I remember the exact moment I stopped chasing the perfect plate. It was close to midnight along Geylang Road, and the air still held the day’s heat like a slow exhale. A woman ladled laksa at a corner stall, her face half-lit by a single bulb, and I realized the steam rising from her pot…
-
Three Late-Night Orchard Plaza Food Spots Open Past Midnight (and One Just Before)
Sarah Teh | June 24, 2026
I’ve spent many nights exploring Orchard Plaza’s vibrant late-night food scene, capturing the warm, honest atmosphere that emerges after most of the city sleeps. Over the years, I’ve sampled nearly every supper spot in this slightly worn but charming building. Some places came and went, but three have remained my go-to late-night haunts, plus one…


")
